
You will learn
Learn how to integrate FosterFlow with your Shopify store. This integration allows you to seamlessly bring your customer profile, order data, and browsing behavior into FosterFlow, enabling you to reach your audience with targeted, data-driven messaging. Additionally, you will learn how to enable FosterFlow’s onsite tracking (Pixel) and activate the App Embed to utilize sign-up forms and popups on your storefront.
Before you begin
If you are migrating from another email or marketing service provider that is currently integrated with your Shopify store, ensure you disconnect your prior provider from Shopify before integrating with FosterFlow. Failure to disconnect your old integration could result in duplicate messaging or conflicting popup behaviors on your live site.
Install FosterFlow
To begin leveraging FosterFlow’s capabilities, you first need to locate and install the app from your Shopify admin dashboard.
-
Log in to your Shopify admin panel. In the top search bar, search for Apps and locate FosterFlow from the dropdown list.

-
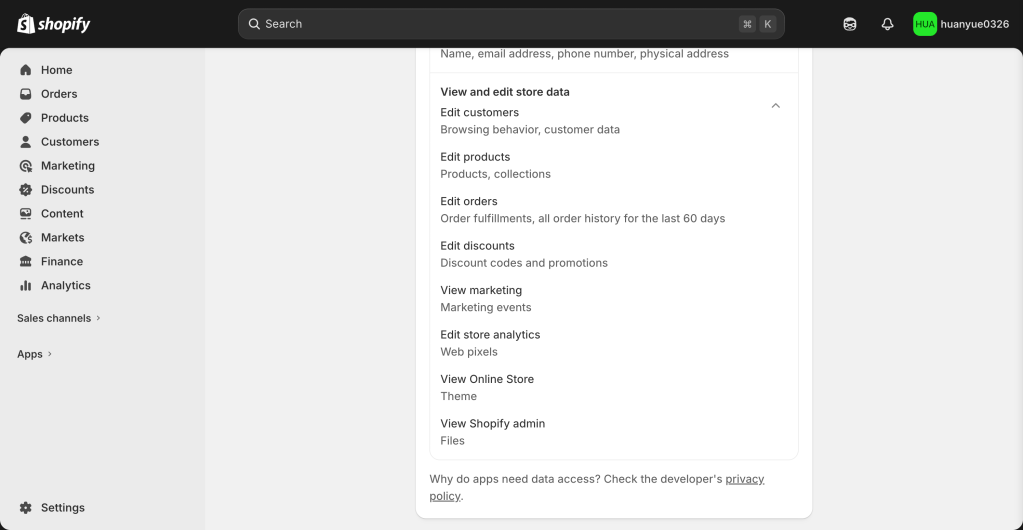
Click on the FosterFlow app. You will be directed to the installation page where you can review the permissions the app requires. FosterFlow needs access to view customer data, device activity, and edit store data to ensure your profiles and events sync correctly.
-
Scroll down to the bottom of the permission details and click the Install button to confirm and authorize the connection between Shopify and FosterFlow.

Check pixel status
Once the app is installed, FosterFlow will automatically begin setting up your store’s integration and connection pixel. You can verify this status within your FosterFlow account.
-
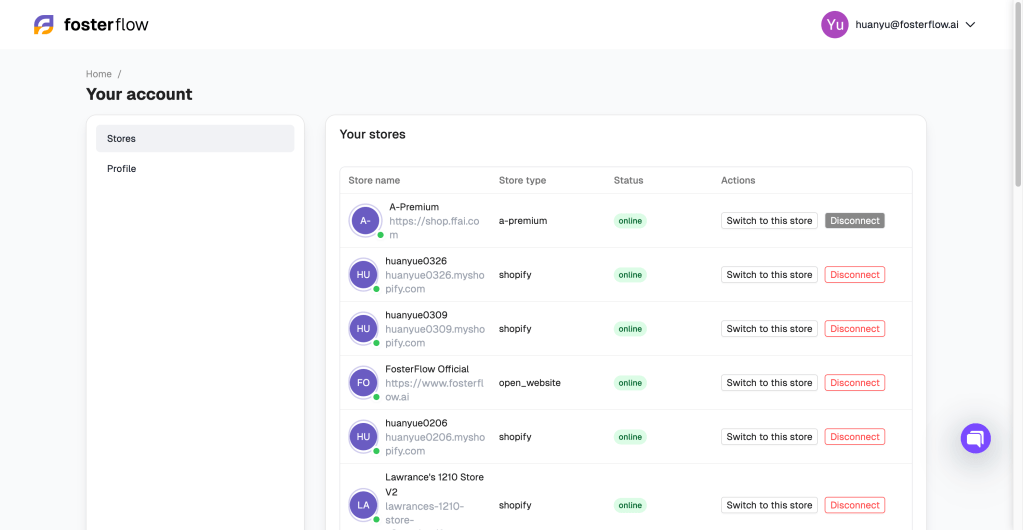
Navigate to your FosterFlow dashboard. Under your account settings, you will see a list of Your stores. Ensure your recently connected Shopify store shows an “online” status.
-
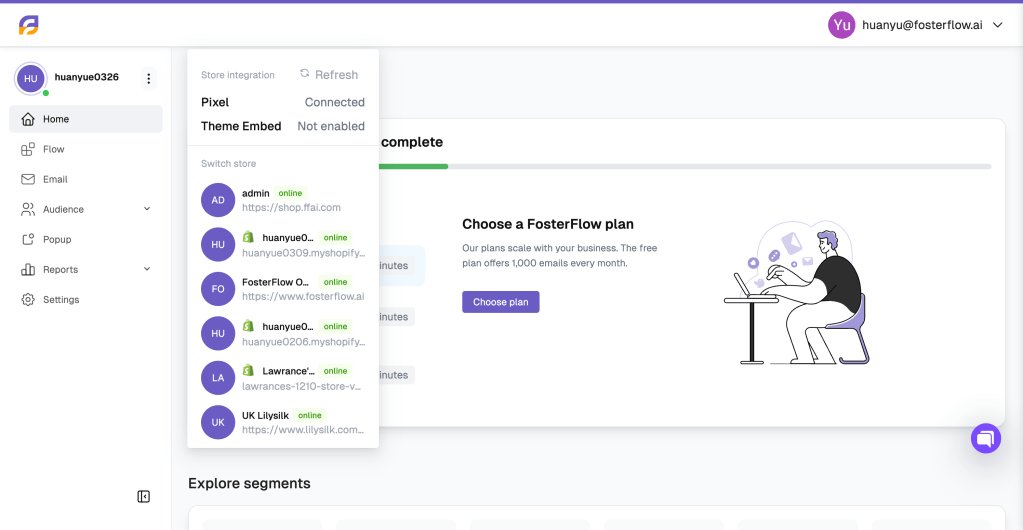
In the left-hand navigation menu, click on your store’s profile icon at the top left to open the store switcher and integration menu. Immediately after installation, you may notice the Pixel status says Not connected and the Theme Embed is Not enabled.

-
Wait a few moments and click the Refresh button in that menu. Your Pixel status should update to Connected, indicating that FosterFlow is successfully receiving backend data from your Shopify store.
Theme Embed for popups
To display FosterFlow popups and track detailed frontend onsite behavior, you must enable the FosterFlow App Embed within your active Shopify theme.
-
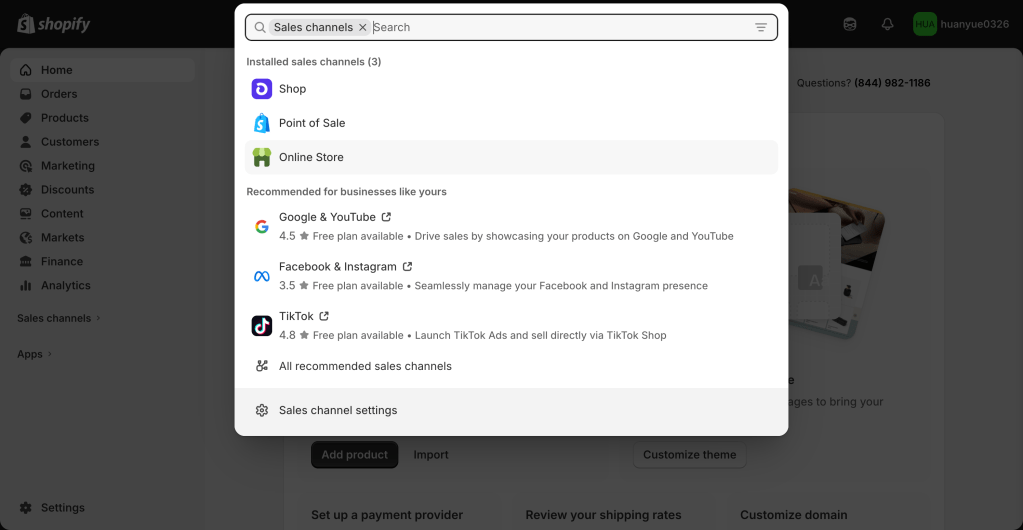
Go back to your Shopify admin dashboard. Using the search bar, look for Sales channels and select Online Store.
-
Under the Themes section, locate your current live theme (e.g., Horizon) and click the Customize button (or Edit theme icon) to open the Shopify theme editor.

-
Inside the theme editor, look at the left-hand sidebar menu and click on the App embeds icon (the icon with a block and a gear/sparkle).
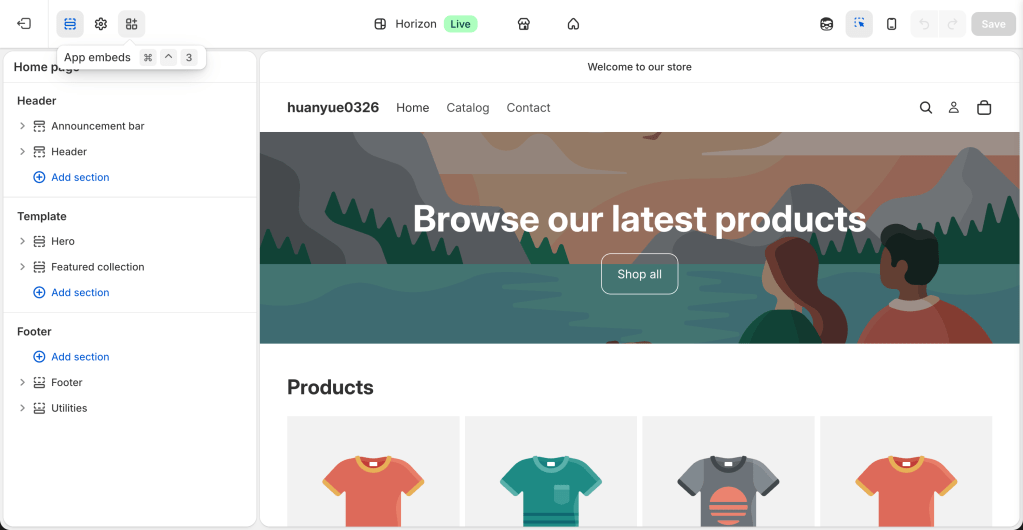
-
In the App embeds list, search for FosterFlow Loader. You will see a toggle switch next to it, which is turned off by default.
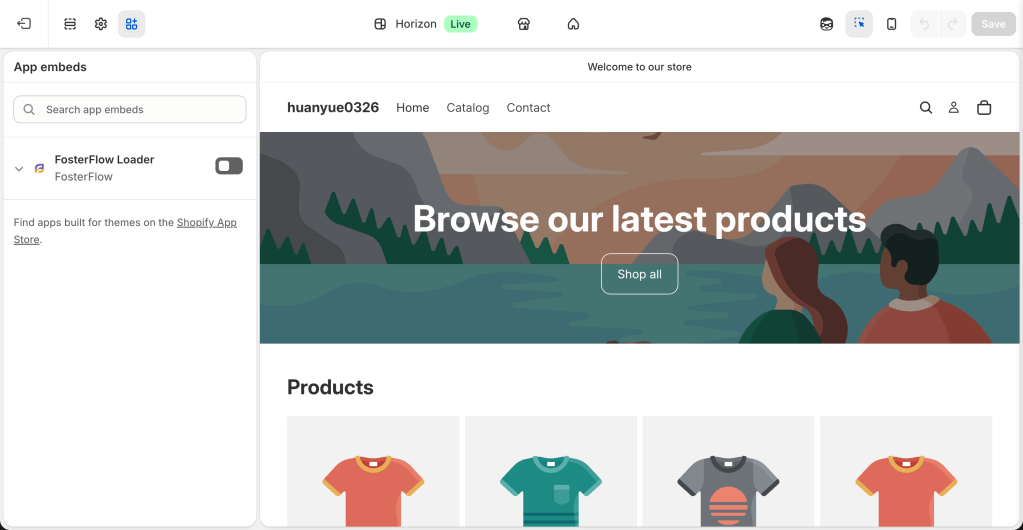
-
Toggle the FosterFlow Loader to the ON position. Once enabled, ensure you click the Save button in the top right corner of the theme editor to apply these changes to your live store.

-
Return to your FosterFlow dashboard. Click on your store profile icon in the top left again. You should now see that both the Pixel is Connected and the Theme Embed is Enabled.

Outcome
Congratulations! You have successfully integrated Shopify with FosterFlow. Your store data will now sync, and with the Pixel and Theme Embed enabled, you are ready to track customer onsite behavior and deploy engaging popups and forms to your visitors.