
After successfully connecting your Shopify store, there are just three essential prerequisite steps left to complete your initial setup. Finishing these tasks will ensure your FosterFlow account is fully configured and ready to launch marketing campaigns.
You can track your progress directly from the Home dashboard.
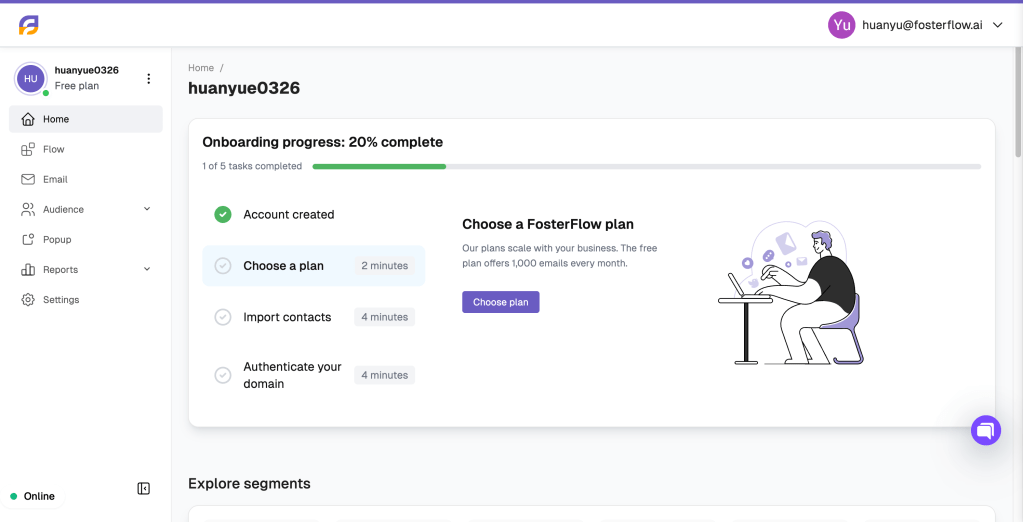
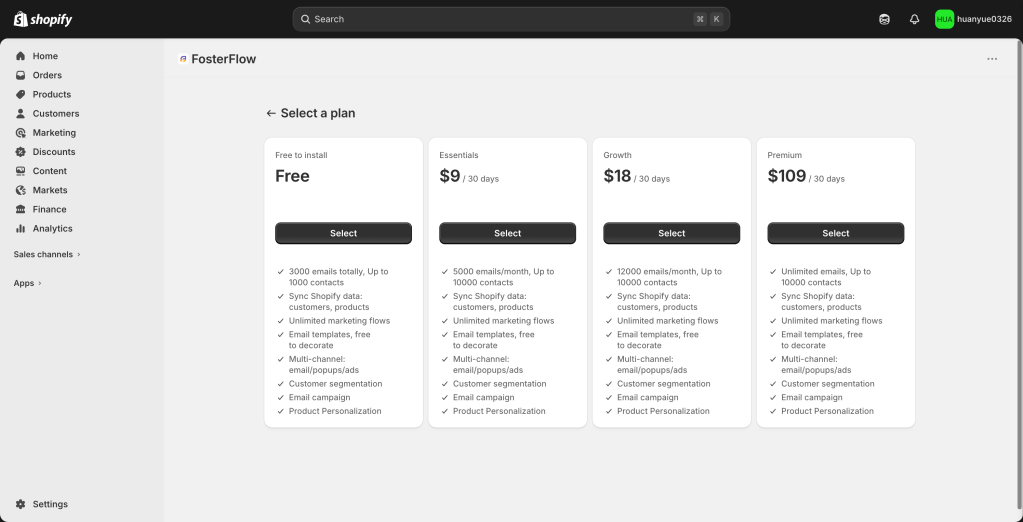
Choose a plan
To get started, click the Select button under the plan that best fits your current business needs. FosterFlow’s pricing is designed to scale alongside your business.
Here is a quick comparison of scenarios to help you choose:
- Free Plan: Ideal for new stores just getting started. It covers up to 1,000 contacts and allows you to send 3,000 emails in total, giving you access to all core features like marketing flows and customer segmentation at no cost.
- Essentials ($9 / 30 days): Great for growing stores with up to 10,000 contacts. It provides a monthly allowance of 5,000 emails, perfect for regular newsletters and basic automated flows.
- Growth ($18 / 30 days) & Premium ($109 / 30 days): Designed for established businesses and high-volume senders. These plans offer significantly higher or unlimited email sending limits to engage a larger audience and maximize conversions.
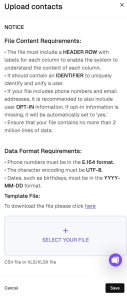
Import contacts
Bringing your existing audience into FosterFlow is crucial for your marketing efforts. You can upload your contact list using a CSV or XLS/XLSX file.
File Requirements:
* Format: Must include a HEADER ROW and an IDENTIFIER (like an email address or user ID) to uniquely identify users.
* Data Formatting: Phone numbers must be in E.164 format. Dates (like birthdays) should be formatted as YYYY-MM-DD. Ensure your file uses UTF-8 character encoding.
* Opt-in Status: If opt-in information is missing for emails or phone numbers, the system will automatically default it to ‘yes’.
💡 Pro Tip:
Depending on the size of your file, the import process may take a little time to complete. We recommend waiting for about 2 minutes after uploading, and then refreshing the page to view your updated audience in the contact list.
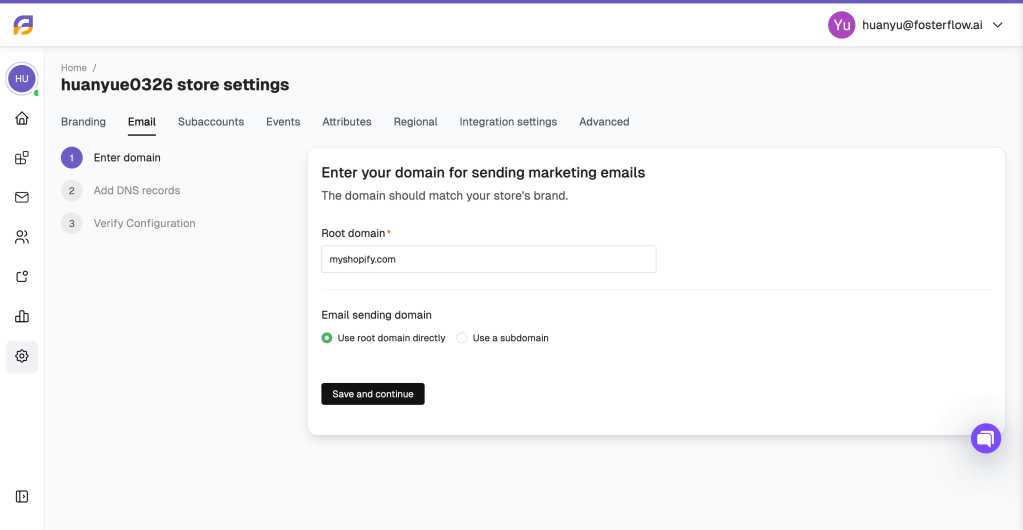
Authenticate your domain
Authenticating your sending domain is highly recommended as it builds trust with inbox providers and significantly improves your email deliverability. The setup is divided into three parts:
-
Enter domain: Input the root domain that matches your store’s brand. You can choose to use the root domain directly or set up a subdomain.
-
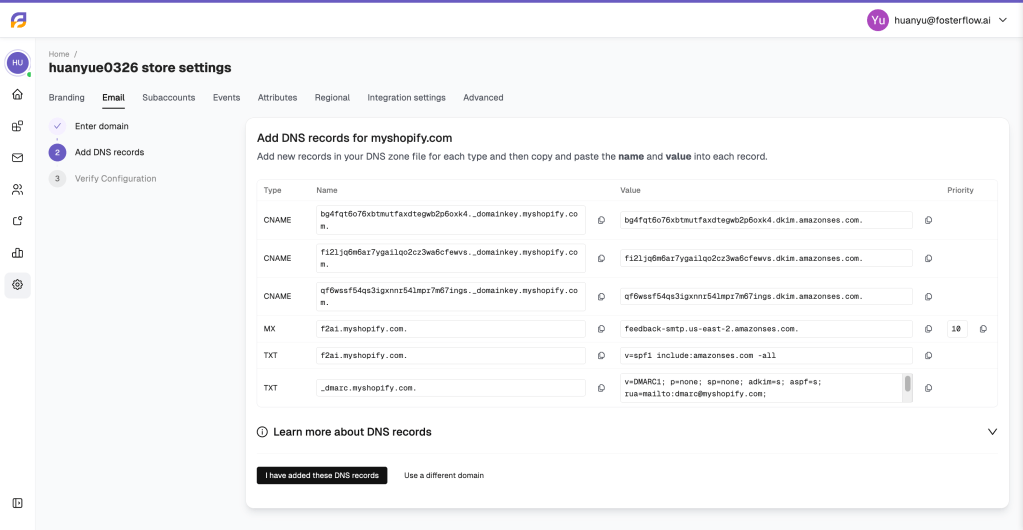
Add DNS records: FosterFlow will generate specific DNS records (CNAME, MX, and TXT). You will need to copy these values and paste them into your domain provider’s DNS zone settings (e.g., GoDaddy, Cloudflare, Namecheap).
-
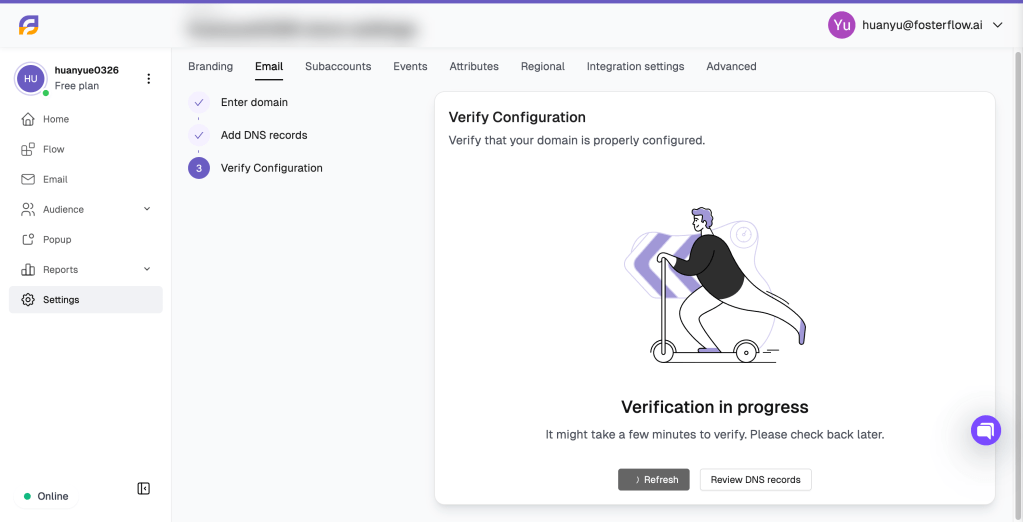
Verify Configuration: Once you have added the records, click to verify. Please note that DNS propagation can take a few minutes to a few hours. Check back later if the verification is still in progress.
Note: If you are not ready or do not have a custom domain yet, you can skip this step. You always have the option to send marketing emails using FosterFlow’s default shared domain without needing any configuration.