
Why does domain matter for email

Connecting your domain to send marketing emails with your brand identity is a fundamental step in setting up FosterFlow. By sending emails from your own domain rather than a shared generic domain, you gain significant advantages:
- Enhanced email deliverability: Internet Service Providers (ISPs) and spam filters favor emails sent from authenticated domains. It significantly reduces the chances of your emails bouncing or landing in the spam folder.
- Brand recognition and trust: When your subscribers see your brand’s domain in the sender address, they immediately recognize who the email is from. This builds trust and improves open rates.
- Domain verification and DNS configuration: Taking control of your DNS configuration allows you to establish a strong sender reputation tied directly to your business.
What is DNS
DNS stands for Domain Name System. In simple terms, it connects domain names to web servers, acting like the phonebook of the internet.
For email marketing, DNS is crucial because it handles email routing and sender authentication. When you send an email through FosterFlow, receiving mail servers look at your domain’s DNS records to verify that FosterFlow is genuinely authorized to send messages on your behalf. Proper DNS configuration is the key to combating spam, spoofing, and ensuring your marketing campaigns safely reach your customers’ inboxes.
Enter domain
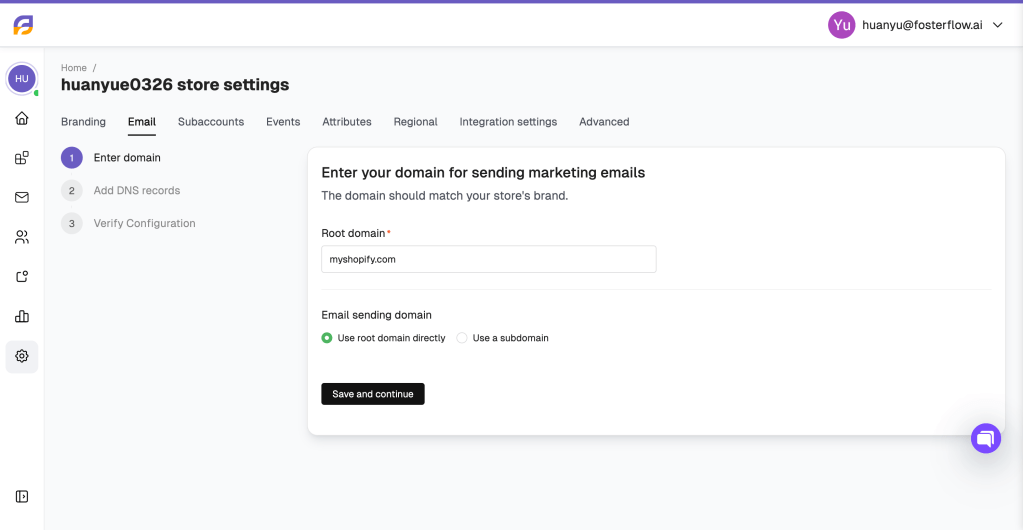
To start sending emails from your brand domain, you first need to specify the domain in your FosterFlow settings.
- Navigate to your store settings and access the Email tab.
- Click the button to set up your branded domain.
- Root domain: Enter your store’s main domain (e.g.,
myshopify.com). This domain should match your store’s brand. - Email sending domain: Select how you want your sender address to be structured. You can either Use root domain directly or Use a subdomain.
- Click Save and continue to generate the required DNS records for your domain.
Add DNS records
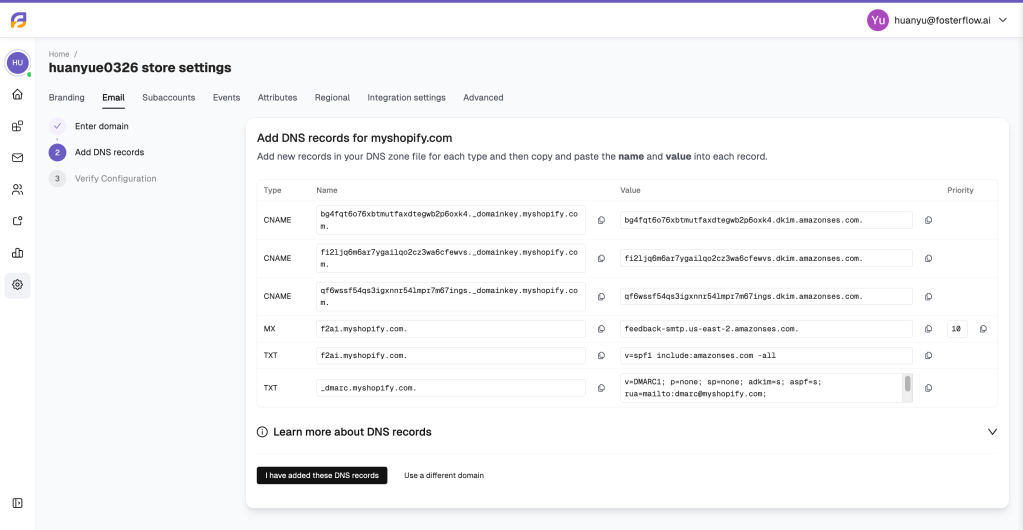
Once your domain is entered, FosterFlow will provide a list of DNS records. You must add these new records to your DNS zone file within your domain hosting provider (such as GoDaddy, Cloudflare, or Namecheap). You will need to copy and paste the Name and Value into each corresponding record.
Here is a breakdown of the different types of DNS configurations required for email authentication:
- CNAME records (DKIM): CNAME (Canonical Name) records are used to set up DKIM (DomainKeys Identified Mail). DKIM provides a digital signature for your outgoing emails. Receiving servers check this signature to verify that the email was indeed authorized by the owner of that domain and hasn’t been modified along the way.
- MX records: Mail Exchange (MX) records direct incoming email messages. In this setup, MX records are used to specify the servers that process bounce messages and feedback loops, ensuring that your email list stays clean and healthy.
- TXT records (SPF): Sender Policy Framework (SPF) is a TXT record that lists the IP addresses and services authorized to send mail on behalf of your domain. It ensures receiving servers accept legitimate emails from FosterFlow and reject unauthorized sources.
- TXT records (DMARC): DMARC builds upon SPF and DKIM to enforce an email policy. It tells receiving servers what to do if an email fails SPF or DKIM checks, protecting your domain against phishing and spoofing.
After you have carefully added all the generated records to your DNS provider, click the I have added these DNS records button in FosterFlow to verify your configuration. Please keep in mind that DNS propagation can sometimes take a little time to complete.